How To Install WordPress On Localhost Right Now
Posted by TotalDC
In the previous article, What is WAMP I explained what is WAMP and why you should use it. Now I’m going to show how to easily install WordPress on localhost using WAMP.
How To Installing WAMP Server On Windows
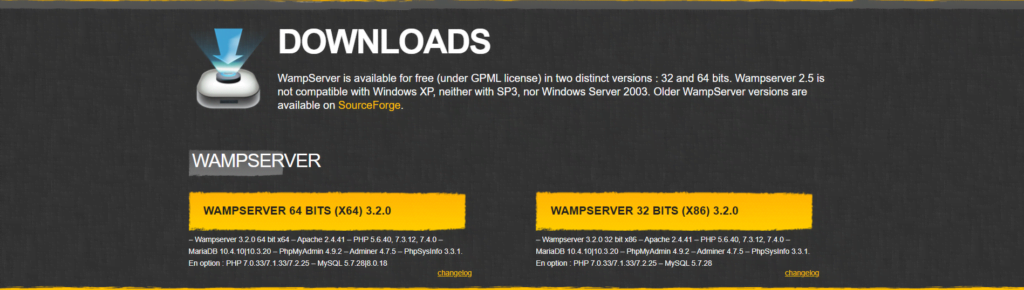
First, you need to download WAMP software and install it on your computer. First, go to the WampServer website and click on the “Start Using WampServer” button.

You will open the download section. You’ll see two versions here: WampServer 32bits and WampServer 64bits. You need to select the WampServer version that matches the operating system on your computer
When downloaded you can click on the WampServer exe file to run the installation. Make sure to follow the instructions on the installation screen.

During installation, you need to define the location of the web browser. By default, it will be Internet Explorer. You can change that to Google Chrome or any other browser that you prefer by location in the Program Files of your computer.
How To Set Up a Database For Local WordPress Setup
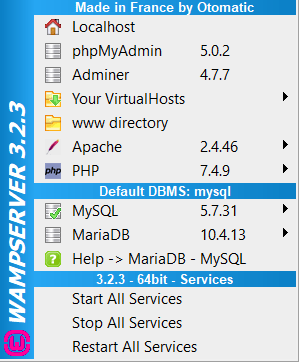
The next thing you have to do is to create a blank MySQL or MariaDB database. On launching WAMP, you’ll see a green WampServer icon at the bottom of your computer screen along with other icons. Click on it and then click on phpMyAdmin. But first, make sure that the WAMP icon is green. If it’s orange or red that means, that one of the services isn’t running. In that case, you have to manually restart WAMP services.
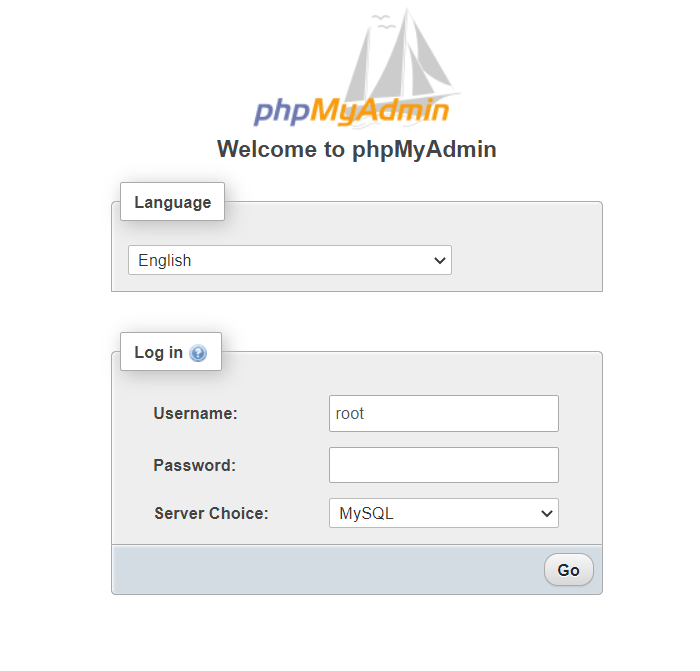
It will take you to the phpMyAdmin login screen on your browser. Simply enter the username root leave the password field empty and click Go. These are the default details to login into your localhost phpMyAdmin account.
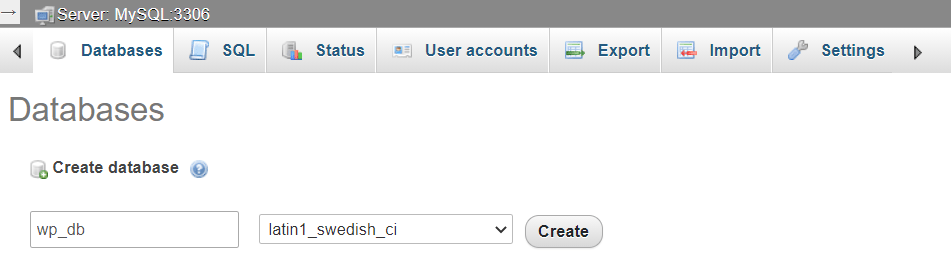
Once logged in, you need to click on Databases in phpMyAdmin to create a new database for WordPress. It will ask you to choose a name for your new database. After that just click Create button.
Now you can install WordPress on localhost.
How To Installing WordPress On A WAMP Server
The next thing you have to do is download the latest version of WordPress from WordPress.org. It will download as a zip file.
Extract the zip file and copy the WordPress folder. Then navigate to the folder where you installed WAMP.
By default, WAMP is installed in C:\wamp64. But keep in mind that it may be different for you depending on where you installed the program.
Paste the WordPress folder into the C:\wamp64\www folder. After that, you can rename WordPress folder to anything you want.
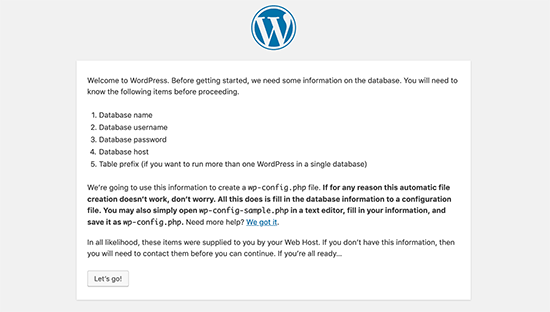
Next, you should open the web browser and go to http://localhost/wordpress.
You’ll be asked to select the language and then show you the database setup information. Once you have read it, you can click Let’s go! button to continue.
Then you need to enter database details (database name, username, password, host, and table prefix).
The database name will be the one that you entered in the previous step. In my case, I called it “wp_db”. The username will be “root” and you can leave the password field blank since you will be working on your machine and localhost isn’t connected to the internet (nobody will have access to your files, but you). You can also leave the database host and table prefix as you see it.
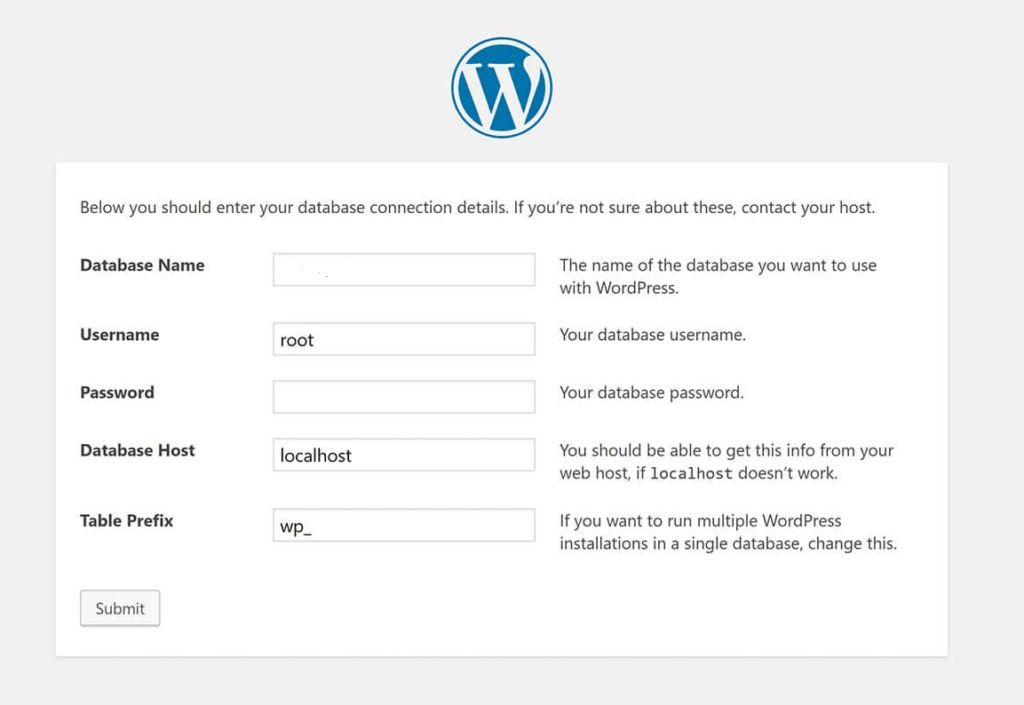
Then click the Submit button and WordPress will create a configuration file for you in the backend.
On-screen, you’ll see a success message saying that WordPress is connected to your database and you can proceed with the installation. Just click the Run the Installation button to continue. You will be taken to the welcome screen of WordPress. You need to add a title for your new WordPress website, choose an admin username, enter the password, and enter the admin email address. And then click the Install WordPress button.
After installation is complete you’ll see a success message. By now WordPress has created new tables in your database and it’s ready to go.
You can then then simply click Log In and go to your website’s dashboard.
Congrats, you have successfully installed WordPress on your computer using WAMP and now are ready to dive in all the fun that is creating your website.